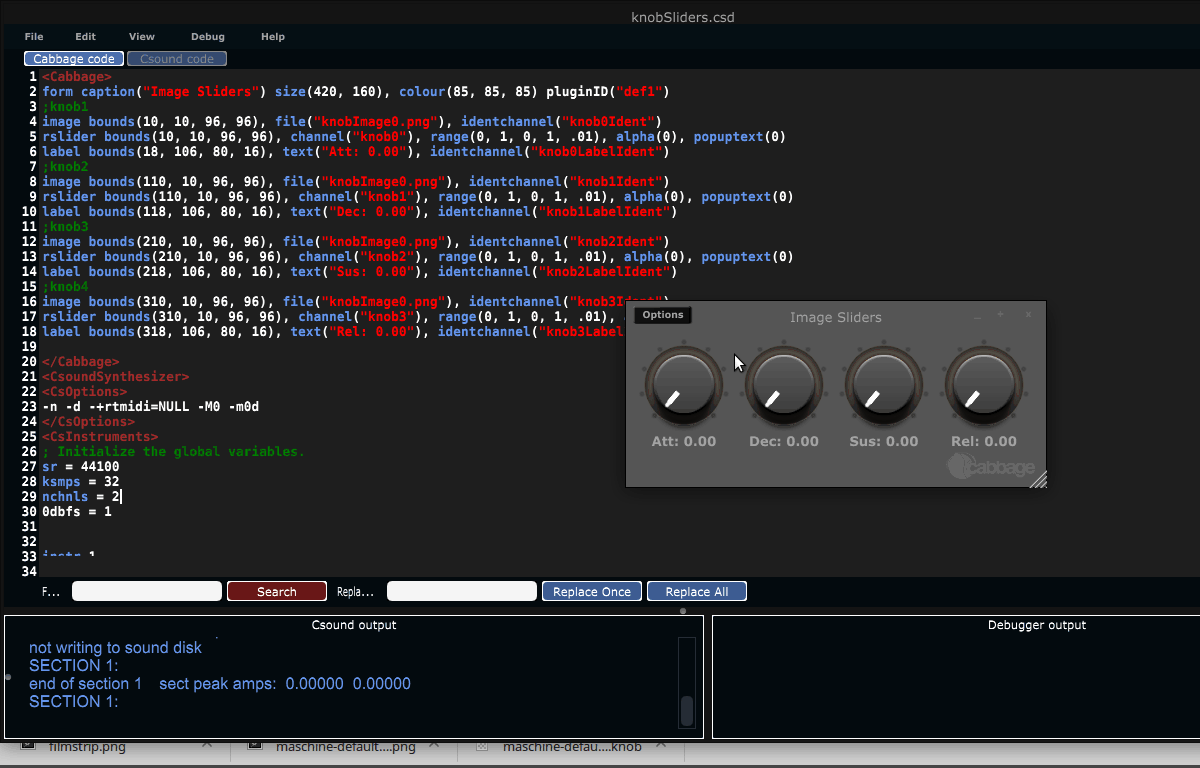
I had a go at using some knobman images for rotary sliders. First I downloaded some filmstrips for here. Then I split them up into single png images using imagemagick and python using the following scripts:
import subprocess
import sys
print "usage: python convertToImage.py 'filename'"
print "example: python convertToImage.py 'knob'"

imageName = sys.argv[1];

for i in range(32):
	command = "convert 'knob.png' -crop 96x96+0+"+str((i)*96)+" "+imageName+str(i)+".png"
	print command
	process = subprocess.Popen(command, shell=True, stdout=subprocess.PIPE)
	process.wait()
After that I was able to quickly use them in Cabbage by dynamically setting the image each image widget displays. I used some arrays so I didn’t have to repeat code four times. I think it works pretty well. Thanks for @Thrifleganger and @tuncark for prompting this little experiment. I’ve attached the images and source code to this post.
Btw, it wouldn’t be difficult to add a way of scrolling through a filmstrip so that one doesn’t need to split the images up. I can add that if people are interested.
Not yet, but it’s on my list of things to do. I was thinking of adding an x and y offset identifier that we could use to scroll through an individual image. That should work Ok I think?
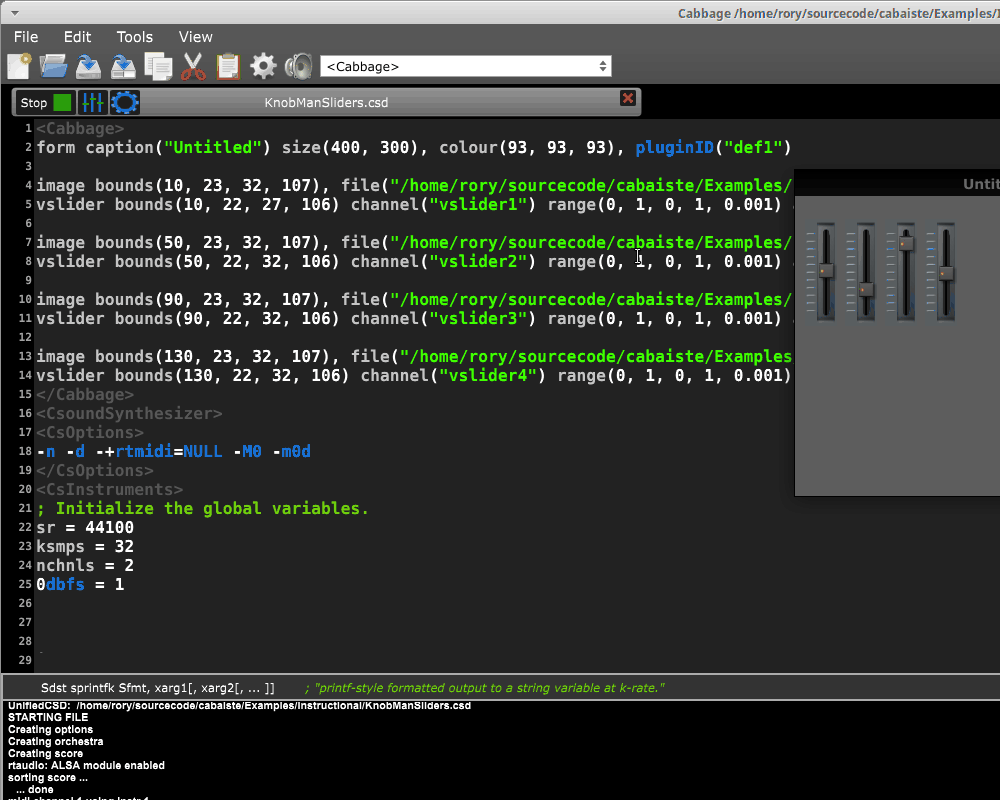
I’ve now have this implemented by adding a crop() identifier to the image widget. I went with the image widget rather than the slider to make things a little more generic. In the example shown below, I place a slider with alpha 0 on top of each image widget. The crop identifier forces the image widget to display only a small part of the source image. It’s then quite simple to dynamically set which part of the image to show using identifier channels().
Note that I would probably wrap this logic into a UDO if I was developing GUIs using this method. Note this is only implemented for .pngs for now.
I will prepare new beta versions of Cabbage2 during the week. This csd will be in the examples. This feature will not make its way into the older version of Cabbage 1.n.
Is there any way with the new Knobman slider feature to have the range different then 0 to 1. Attach is an example, one with the range at 0 to1 for the slider, but the other is a range of 0.32 to 3.2.
The UDO that I wrote could also be updated to take these things into account. I just wrote it as a quick example. But it could certainly be modified and made more robust.
p.s. you mention a range of .32 to 3.2, but in your example it goes from .175 to 5.75?
Hello Rory,
What is the status of using knobman sliders and knobs ?
The example in the miscellanous section uses only one png file and on the first post, you talk about splitting the knoman file into several image.
Could you please update the tutorial ?
Many thanks
You don’t need to use multiple PNGs, although you still can if you want. I think it’s easier to use just the one, and use the crop identifier to determine what is actually seen at any one time. The example in the Misc folder had some absolute paths that were causing some display problems. I’ve fixed that now.
I start to understand what is the aim of each parameter in the crop function. Is the crop function documented somewhere?
Also, is it possible to use this technique with endless encoders?
My apologies, it doesn’t seem to have made it into the docs! I’ll sort that now. Yes, it can be used with an endless encoder. Crop takes 4 parameters, x, y, with and height. The idea here to to place a slider over an image. Then set the slider’s alpha value to 0 so that it is not seen. Then use crop() along with an identchannel with the image to display whatever part of the image you wish. The UDO in the example can be easily hacked. Let me know if you are finding it tricky to work with.